
After seeing the 4 part post over at Shed Wars I felt inspired to embark on a similar, if smaller scale, project of my own. I haven't bought MDF scenery before and wanted something small to get stuck in to. Rather than going for the large awe inspiring petite properties church I decided to go for something that wouldn't quite overpower our gaming table.
After searching the net I found a nice little MDF church on ebay for the paltry sum of 15 pounds, a bit cheaper than the 50 pound monstrosity over at PP. That's not to say the large church isn't a lovely model, it's amazing. The smaller one is much more affordable and manageable as a starting project at 10" long and 4 1/2" wide, excluding the doorway. Plenty big enough for small-medium sized table games and could easily be used to represent a Saxon or Norman church, or even be used up to WW2.


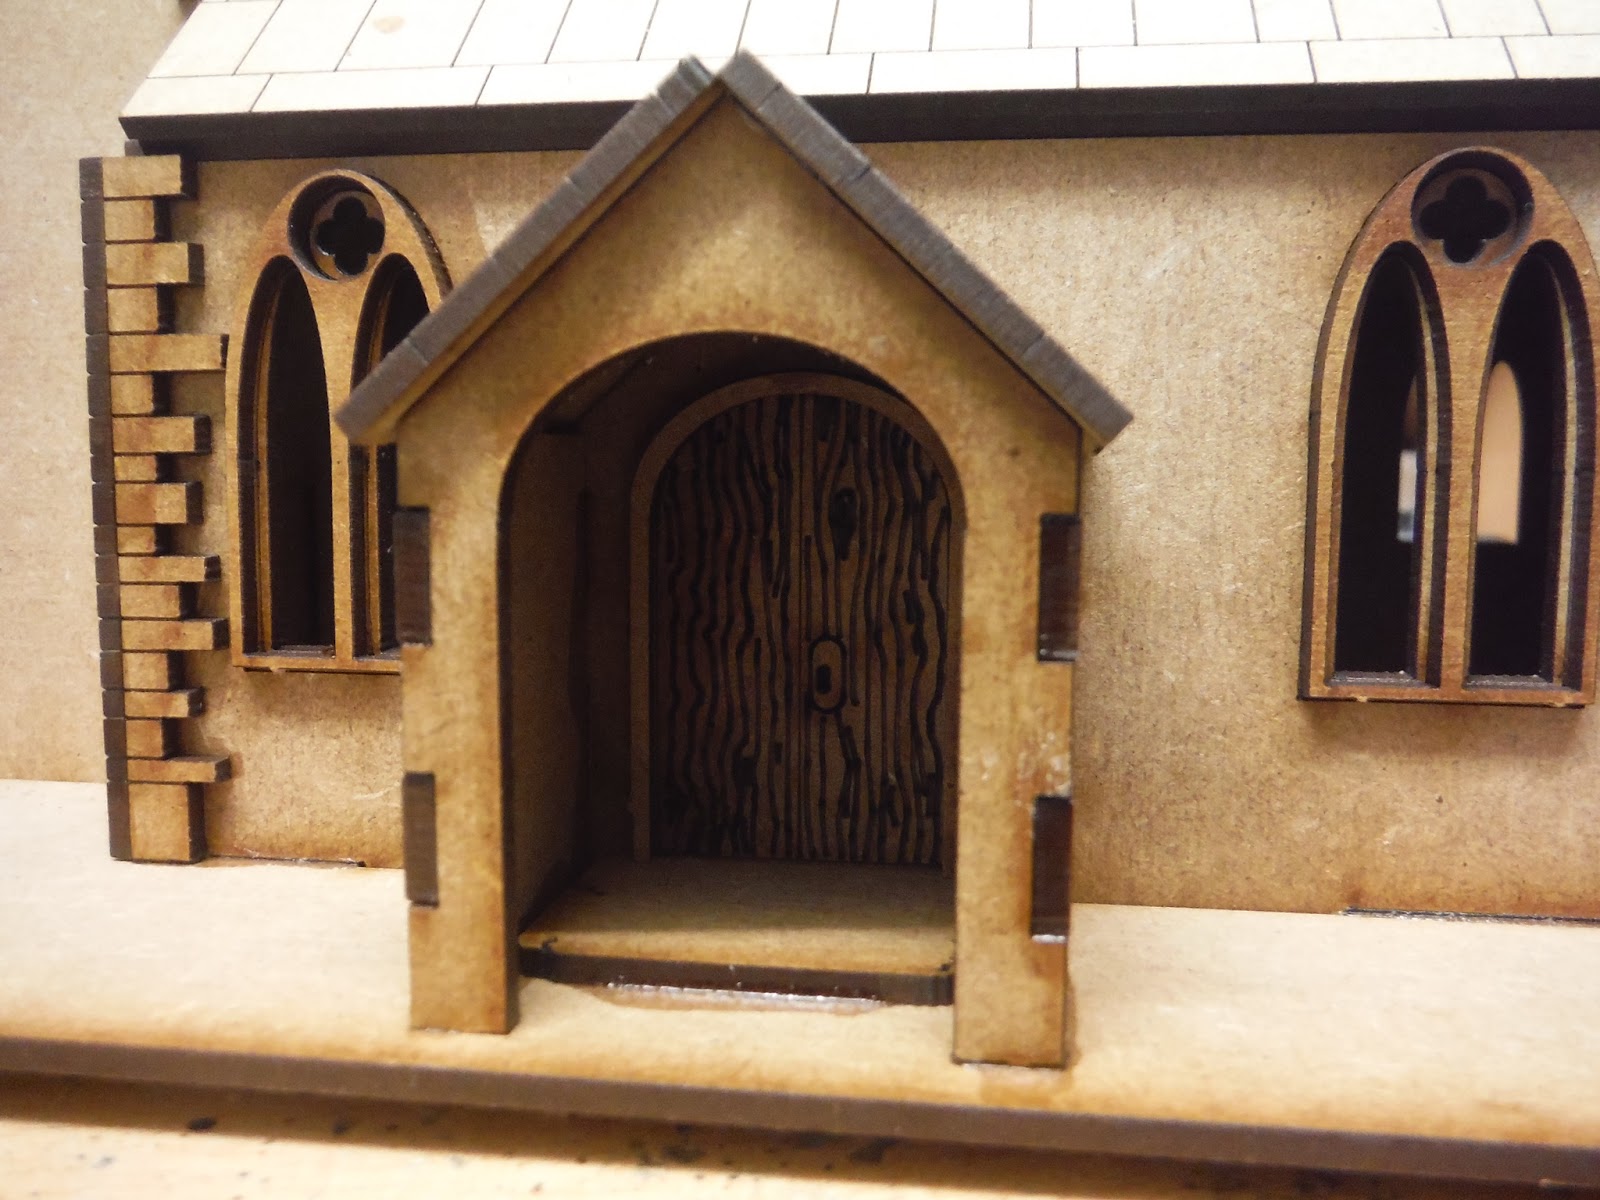
The church arrived pretty swiftly on some lovely sheets of laser cut MDF, all very nice and neat plus easy to remove.

Once I had everything out and any extra bits trimmed I had a nice neat pile of parts collected on my desk and now it was time to get cracking. With a small amount of trepidation (due to no instructions) I started to assemble the church, which turned out to be surprisingly easy. It all slotted together and was strong enough even before I added the glue. I got it all put together and all the trimmings, quoins, windows etc on in no time. Even before painting it was starting to look nice!


Once this was done I sprayed the entire thing with grey spray paint, picked up from the local pound store.


However...this being my first time painting stone buildings I then decided to spray it black!
After this 2nd basecoat was dry I applied sand to all the walls to represent flint, as seen on many Norman style churches across Britain and Ireland. I was fairly careful not to get sand on the windows and quions, but where i made a mistake I just went over it with a blunt knife and scraped it off. At this point I also applied sand to the base for later on.
On another note when I got my builders sand for basing I put all of the sand through a sieve to separate out nearly all the small stones from the sand. This then got put into separate containers for various projects. It wouldn't do for fairly substantial sized stones to be sticking out the side of the church! Then I went back to spraying the entire thing grey. Yes...grey this time! At this stage it was beginning to shape up nicely.


I followed up the grey spray paint with successive layers of grey drybrushing, using lighter and lighter greys, more sparingly each time. I also added light drybrushes of various browns, creams and finally white to the flint parts. I see flint a lot in my line of work and it is rarely, if ever, grey. Its more usually various shades of brown. However the grey looks very nice and the odd bit of browns and creams stands out nicely!
At this stage I also tried to vary the roof tiles to look like some had been replaced and weathered separately. I randomly painted a number of tiles different greys and then washed the whole roof with GW Devlan mud to dirty it up. Overall it made the roof look nice and weathered, as it should from being in a wet miserable country! It also ment that the roof ended up being a completely different grey than the rest of the church, helping it to stand apart from the walls and look more like dark grey slate.


Finally I painted the base dark brown, drybrushed it various lighter browns and flocked the entire thing. The entire model then got a couple of coats of Matt varnish to help protect it and take some of the shine out of the roof! I also added some army painter tufts to the grass to break it up a little.
I have to say I'm rather happy with the finished product. It'll make a nice centrepiece for any Dark Age battle, especially when combined with JustJohns monks and piggies! I think this will be the first of many MDF terrain pieces. I never really grasped before how nice the MDF products can be made to look with only a little work.


Whilst this miniature isn't one of historical accuracy it is of a size that nearly everybody is familiar with and so is a good scaling figure. As you can see the church is a decent enough size, especially for the price. If I were to start the project again I would possibly leave the roof unglued, to allow models to fight inside, once church interior scenery was purchased. The other thing would be to glue acetate to the inside of the windows after all the painting and spraying was finished, rather than leaving them open. Possibly even printing stained glass type colours over it. But still... It looks great, especially for the small amount of work involved. Mainly a lot of waiting for things to dry. Looks even nicer than in the photographs!


Delighted to have been an influence..your church looks great !!
ReplyDeletewell done
Eric the Shed
Thanks. Your blog is both an inspiration and a source of despair at how nice everything looks :)
Deletethank you...
DeleteHi
DeleteI like your church a lot but I cant find it on the web. Do you have still the name of the ebay seller ?
thanks
Luis
Hi Luis the link is in the 2nd paragraph but here it is again
ReplyDeletehttp://www.ebay.ie/itm/Wargames-Terrain-WW2-Bolt-Action-Scenery-28mm-Church-/391063033137?hash=item5b0d2c5531
The item is temporarily sold out at present but the seller (wargamestournaments) could be contacted to ask about restock.
I did see another similar church this week . Here is the link
Look at this on eBay http://www.ebay.co.uk/itm/201965152165
There are a few different ones if you look for 28mm church on ebay.
I hope this helps and good luck with your church!
Lahore Church has been serving God in nations since 2009. Our aim is:
ReplyDeleteChange lives in the name of Father God, Son and Holy Spirit, through Worship, prayers and education of Holy Bible.
To make followers of Jesus